How to upload YouTube videos faster
YouTube is no doubt the most popular streaming platform. With over 2.3 billion users worldwide, YouTube has managed to keep its audience captivated by providing the freedom to upload various genres of content and making it readily accessible with just a few clicks and taps.
If you are a YouTuber or someone who is recently experimenting with YouTube and are looking for ways to upload videos to YouTube faster, then you have come to the right place.
In this article, we will look at the various issues that cause slow uploads to YouTube and then we will provide solutions to them for a faster upload. So let’s get started without further ado.
Reasons for slow uploads:
The difference in frame rates between exported and recorded videos: If you exported your video in a higher frame rate(say 60fps) than the frame rate in which you recorded it(say 30fps) then it will just make the uploads drastically longer without even increasing the quality since it will be uselessly playing a frame twice instead of once. Hence, always make sure that your content should be encoded and uploaded in the same frame rate it was recorded.
Using your internet for various other tasks while uploading: Uploads in YouTube are designed to take the full potential of your upload speeds. The upload speeds are affected if you are using your internet at various other places such as streaming, downloading, rendering, etc. Hence, avoid using your internet at other places while the video is uploading.
Slow internet connection: It is quite obvious that a slow internet connection will result in slow uploads. If you are using a wireless connection(WiFi), it is recommended to switch to a wired connection. For this, connect an ethernet cable from your computer to a free LAN port on your modem or router. This will ensure the fastest speed available.
Not using an appropriate browser: If you are using an old version of your browser, consider updating to the latest version. This will ensure fast packet transfers thus resulting in faster uploads. YouTube recommends using the latest version of Google Chrome, or Firefox browsers when uploading videos since these browsers are optimized to handle YouTube uploads.
So these were some general issues with quite simple solutions that might be the cause for slow uploads. Working on them are surely guaranteed to make your uploads at least faster than before. Coming to more specific solutions that will surely improve your upload speeds are:
Uploading your videos faster using MP4 format
YouTube recommends the container of the video to be an MP4 instead of other video formats such as MOV, AVI, or WMV. Sticking to this guideline will ensure faster uploads to YouTube.
How to convert your videos to MP4:
- Click here to open the free online converter by CloudConvert.
-
Click on Select File.

- Select the video file that you want to convert to MP4.
-
Click on the drop-down menu next to Convert to and select MP4.

- Click on Convert.
- Your video file will now be uploaded for conversion. The time taken for upload and conversion will be proportional to the size of your video file.
- Once the conversion is done, click on the green Download button to download your MP4.
Uploading your videos faster by changing video and audio codecs
YouTube recommends using an H.264 codec for your videos and an AAC-LC codec for your audio.
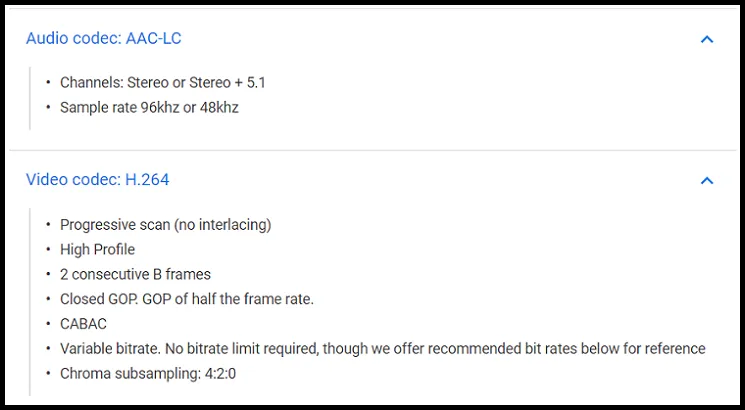
But, what is a codec?
Codecs are compression technologies and have two components, an encoder to compress the files, and a decoder to decompress.
H.264 is one such codec and is best suited for video compressions.
We can use any video editor available in the market to change the codec of our video and compress it. We can also optimize it further by changing the audio sample rate, deinterlacing and many more thus ensuring faster uploads. Here, we will be using free software called HandBrake to optimize our videos for YouTube.
About: HandBrake is a tool for converting video from nearly any format to a selection of modern, widely supported codecs. Not only can it convert and compress videos to any format, but it is also free and open-source. It is available on multiple platforms such as Windows, Mac and Linux.
How to:
- Hit on the following link to download HandBrake for your machine.
-
Once it is successfully downloaded and installed, you should see an interface resembling this when you open the app:
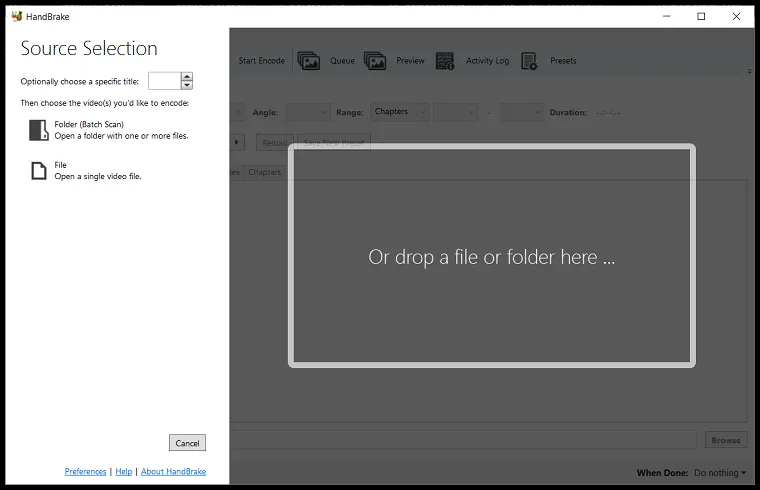
- Click on File to open a single video file that you want to optimize.\
-
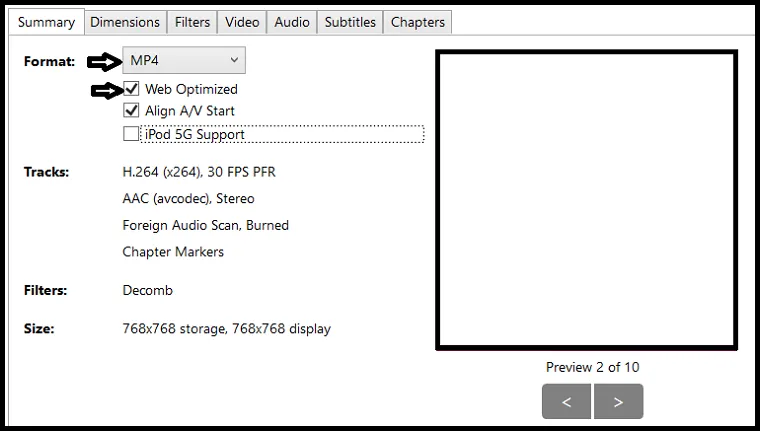
In the Summary tab, make sure that the Format is MP4 and check on the Web Optimized checkbox if not already checked.
- Next, Go on the Video tab and make sure that the video codec is H.264.
-
Select “Same as source” in the drop-down menu next to Framerate (FPS).
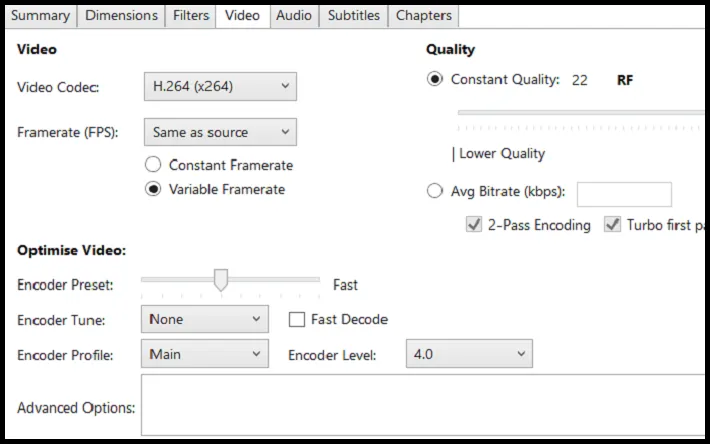
- If you wish, you can also switch to Constant Framerate from Variable Framerate.
-
Go on to the Audio tab and make sure that the codec is AAC(avcodec).

-
Finally, click on the Browse button in the bottom-right corner of the app to select a location where your optimized video will be saved.

-
Click on the Start Encode button present at the top to start the encoding process.

- You can find your compressed video in the same location which you selected earlier for saving your video.
So these were some of the general and specific solutions and tips to increase your upload speeds. Sticking to these tips and solutions will surely save you a drastic amount of upload time and will provide you with some noticeable changes in your next YouTube uploads.
Hope you try them out.


