How to edit your Zoom recordings to view them better
Congratulations! Your search for “How to edit Zoom recordings” has landed you in the perfect place. Zoom has undoubtedly emerged as one of the most used video-conferencing platforms in recent days. It has successfully connected socially distant peers and colleagues to collaborate and work together in this pandemic. On top of Zoom’s quick video conferencing technology, its features such as changing the background, reacting with emojis, and most importantly, recording the meeting have added a cherry on the top.
Recording a meeting is an essential aspect for the organizer since sometimes, participants of the meeting might be busy and miss the meeting. Or they might be having bad internet connectivity or another meeting clashing. Whatever be the reason, recording the meeting is always prefered as it can also be used as a reference for the future.
Thankfully, Zoom provides an inbuilt-recorder for the organizers to record their meetings. But, this doesn’t put an end to the problem. A Zoom recording always comes with some amount of unwanted recording, awkward silences, noisy chit chat and more. Therefore, it is always a good practice to edit your Zoom recording before sharing it with others.
Here we will look at some of how you can edit your Zoom recordings. So let’s get started without further ado.
Trim out unnecessary parts of your Zoom recording
About: Many of the times, a Zoom recording is filled with quite a few minutes of irrelevant footage. This is especially true for the start and the end of the Zoom meeting where the participants are still joining and leaving respectively. It might also happen in between the meeting due to bad connections. Hence, it is recommended to trim your recording. Not only will it remove the unwanted bits, but will also shorten your recording for faster sharing and downloads.
How to:
- Click here to open the free online video cutter by 123Apps.
-
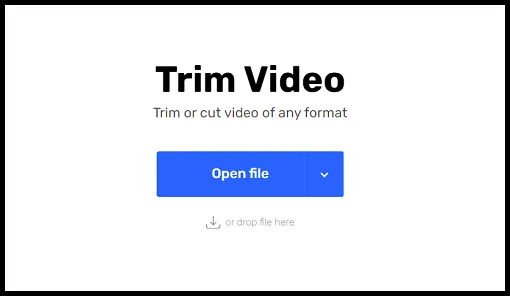
Click on Open file and choose your Zoom recording. You can alternatively just drag and drop your Zoom recording in there.
-
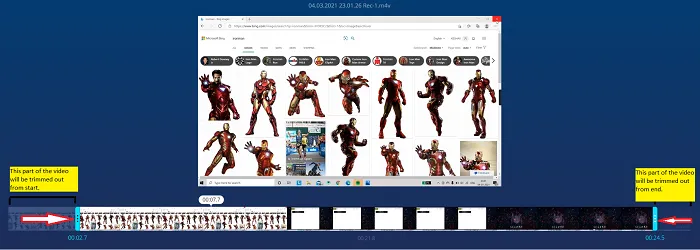
To trim your recording from the start, drag the leftmost blue panel to the left till the place you want to be trimmed out. To trim your recording from the end, drag the rightmost panel to the left similarly.
-
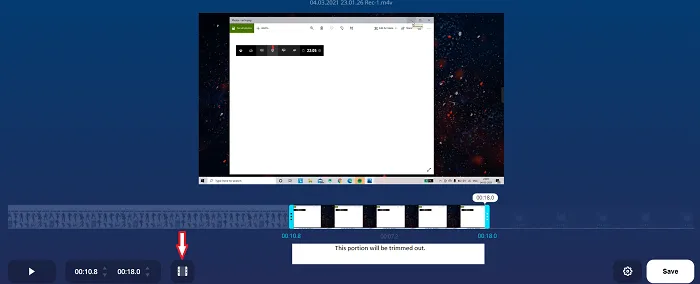
To trim a part from between, select the portion you want to trim by bringing the left panel and right panel to the clip that you want to be trimmed out and click the reverse trim button.
- Finally, hit Save to save and download your trimmed Zoom recording.
- You have now successfully removed the unwanted bits from your Zoom recording.
Add subtitles to your Zoom recording
About: As Zoom is a multi-platform application, it’s quite obvious that not everyone will be watching the recording sitting in front of a computer screen or desktop. Some people might prefer to watch the recording on the go and this generally requires the video to be more visually understandable. Hence, you must add subtitles to your Zoom recording. Not only will it improve accessibility, but it also looks well-organized and professional.
How to:
- Click here to open Kapwing’s free online video editing studio.
-
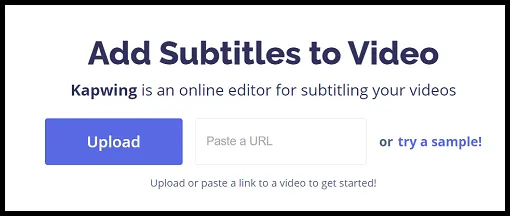
Click on Upload to upload your Zoom recording from your local machine or paste the link of your Zoom recording from the cloud.
- Now, you can add subtitles to your recording in three ways:
- Add subtitle: Click on + Add subtitle to manually type and add subtitles to your recording.
- Auto-generate: Click on Auto-generate to automatically generate a transcript based on the language used in the video. You can even choose to translate your transcript to another language. Note: Auto-generation of subtitles is still a beta feature and might be prone to some errors.
- Upload .SRT: Click on Upload.SRT to simply upload an SRT file of subtitles to appear in your recording.
- Once you are done adding the subtitles in the desired way, click on Done present at the bottom-right corner of the screen.
- Click on Export Video present at the top-right corner of the screen to export your video.
-
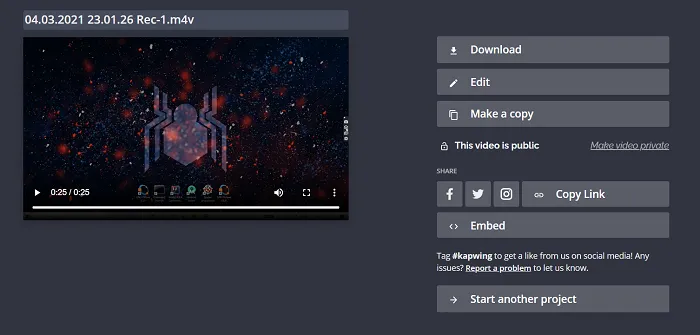
Once your watermark-free video is exported, hit the Download button to download it.
Add transitions and title to your Zoom recording
About: It is recommended to add a central title to your Zoom recording which is visible just above the recording so that the viewers might get a gist of what the video is about. Similarly, adding transitions to your recording helps in separating the various contents of your video. For example, in the case of an official meeting, a recording might be divided into various parts such as introduction, agenda, discussion, solutions, conclusion. Adding a transition to denote the beginning of each of these parts helps the viewer to grasp the content more efficiently.
How to:
- Head over to Kapwing’s Online Video Editor.
-
Upload your recording or drag and drop your recording in the box.

-
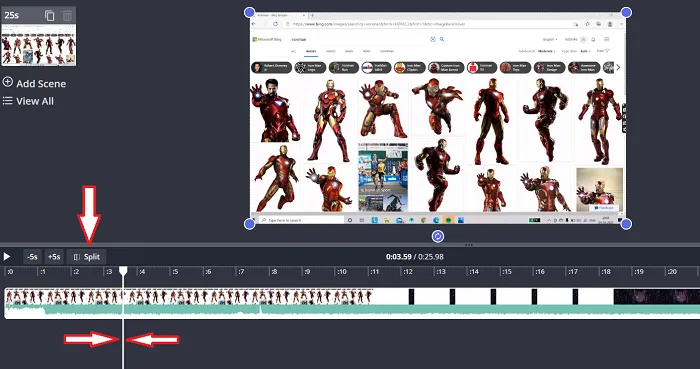
To add a transition in between the video, drag the white divider to the part where you want to add the transition and select Split.
-
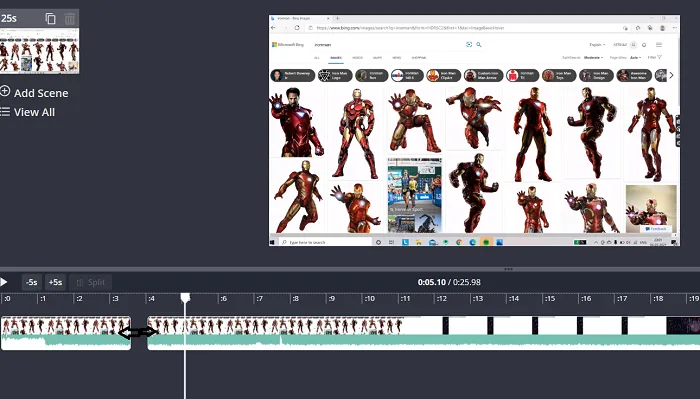
Drag the split parts. The more you drag, the longer will be the transition.
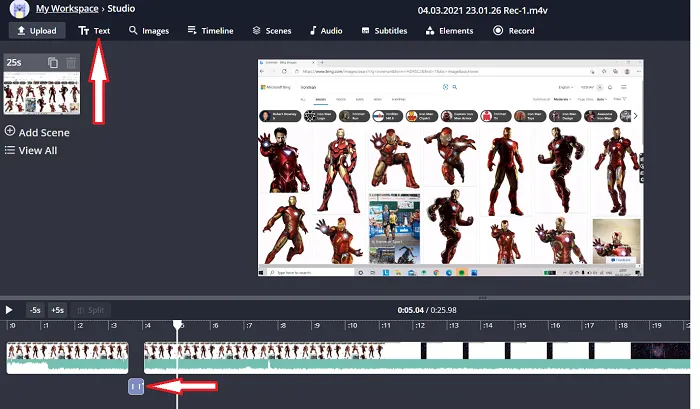
- To add a text in between the transition, hit Text and add your text.
-
Then, drag and fit the text in between your transition.
- To add a title, similarly hit on Text and drag its timeline across the entire duration of the video.
- Finally, click on the Export Video button present at the top-right corner of the screen.
- Once your video is exported, hit Download.
Add GIFs to your Zoom recording for entertainment
About: GIFs always convey the right emotion in a humorous eye-catching way. Adding a GIF to your Zoom recording is a sure-shot way to attract a lot of attention and keep your viewers engaged. You might also add GIFs in your transitions or in between the video where the content is not so important.
How to:
- Head on to Kapwing’s Online Editor to start adding GIFs to videos.
- If asked to sign in, sign in with your Google Account if you have one.
-
Click on the Get Started button to start the editor.

- You can either upload the URL of the video you wish to add GIFs to or just upload a video from your local machine.
- Click on Click to Upload and choose the video file you want to add a GIF to. Alternatively, you can also drag and drop your video file there.
- Your video file will now start uploading to the online studio.
-
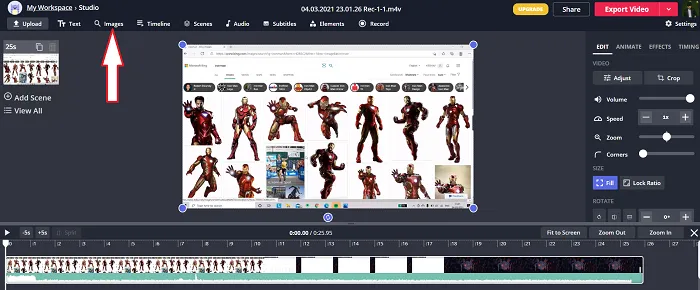
Once your video is uploaded, click on Images to search for a GIF from Kapwing’s library.
-
Search for your desired GIF. Make sure to add the word “ gif ” in the search to filter the search results to GIFs.
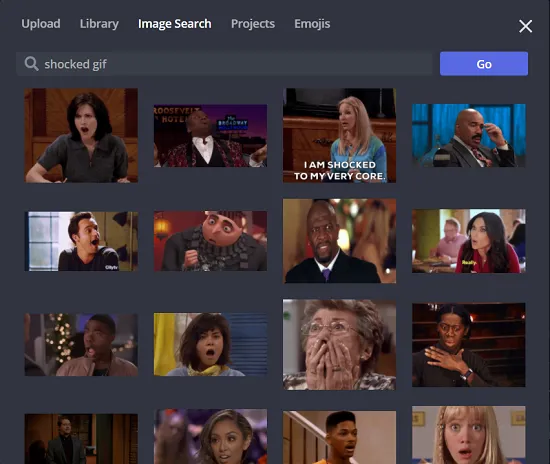
- Click on the GIF that you want to add to your video.
- You can resize your GIF using the four-pointer corners. Drag the GIF to position it on the video.
-
If you want your GIF to appear for the entire duration of your video, drag the edges of your GIF till the start and end of your video.
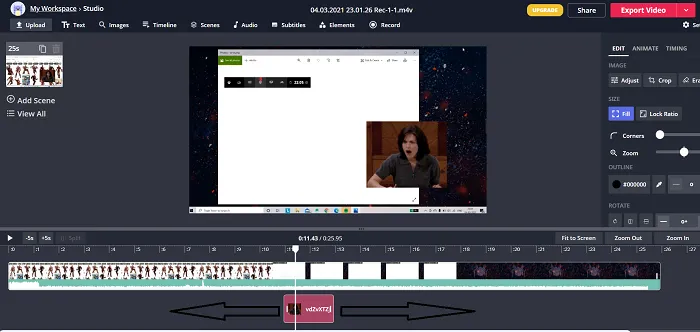
- However, if you want your GIF to appear for some specific part of your video, drag your GIF to the corresponding part.
- In case you want your GIF to disappear and appear again later in the video, add the same GIF again in the same manner and position it to the part where you want it to appear again.
- Once you are satisfied with your editing, click on the Export Video button present in the top-right corner of the window.
- Your watermark-free video is now getting rendered and exported. The time taken for rendering will be proportional to the edits and the duration of the video.
-
Once it is exported, hit Download to download your video.
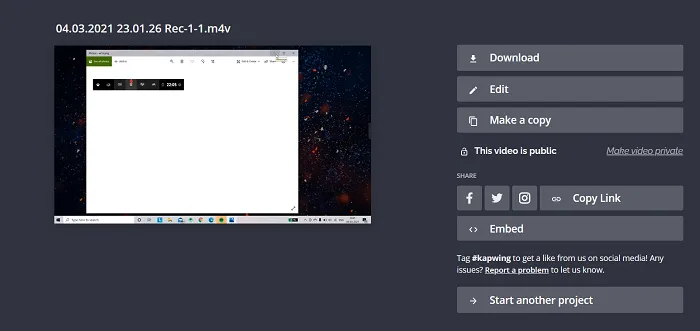
- Enjoy! Now you have a cool video you added a GIF to.
So, these were a few of the tips to edit your Zoom recording to make it more informative, concise, and entertaining for your viewers. Hope you try them out.


